| title | Getting Started with McpMux |
|---|---|
| description | Download McpMux, install an MCP server, connect Cursor/Claude/VS Code, approve the connection, route each folder to the right tools, and let the AI optimize its own toolset. Full step-by-step setup. |
Get McpMux running, connect your first AI client, and dial in exactly the tools it sees — in a few minutes.
- Operating System: Windows 10+, macOS 12+, or Linux (Ubuntu 20.04+, Fedora 38+)
- AI Client: At least one MCP-compatible client installed (Cursor, Claude Desktop, VS Code, Windsurf, …)
Download McpMux for your platform from the download page.
- Windows: run the installer (
.msior.exe) - macOS: open the
.dmgand drag McpMux to Applications - Linux: install via
.deb,.rpm, or.AppImage
McpMux runs in the system tray — look for its icon after launch. A default Space (an isolated environment for servers + credentials) is created for you; you can add more later for work/personal/per-client separation. See Spaces.
Open Discover in McpMux (or browse the registry on this site) and click Install on any of 100+ servers — GitHub, Filesystem, Postgres, Slack, Brave Search, and more. It's added to your active Space.
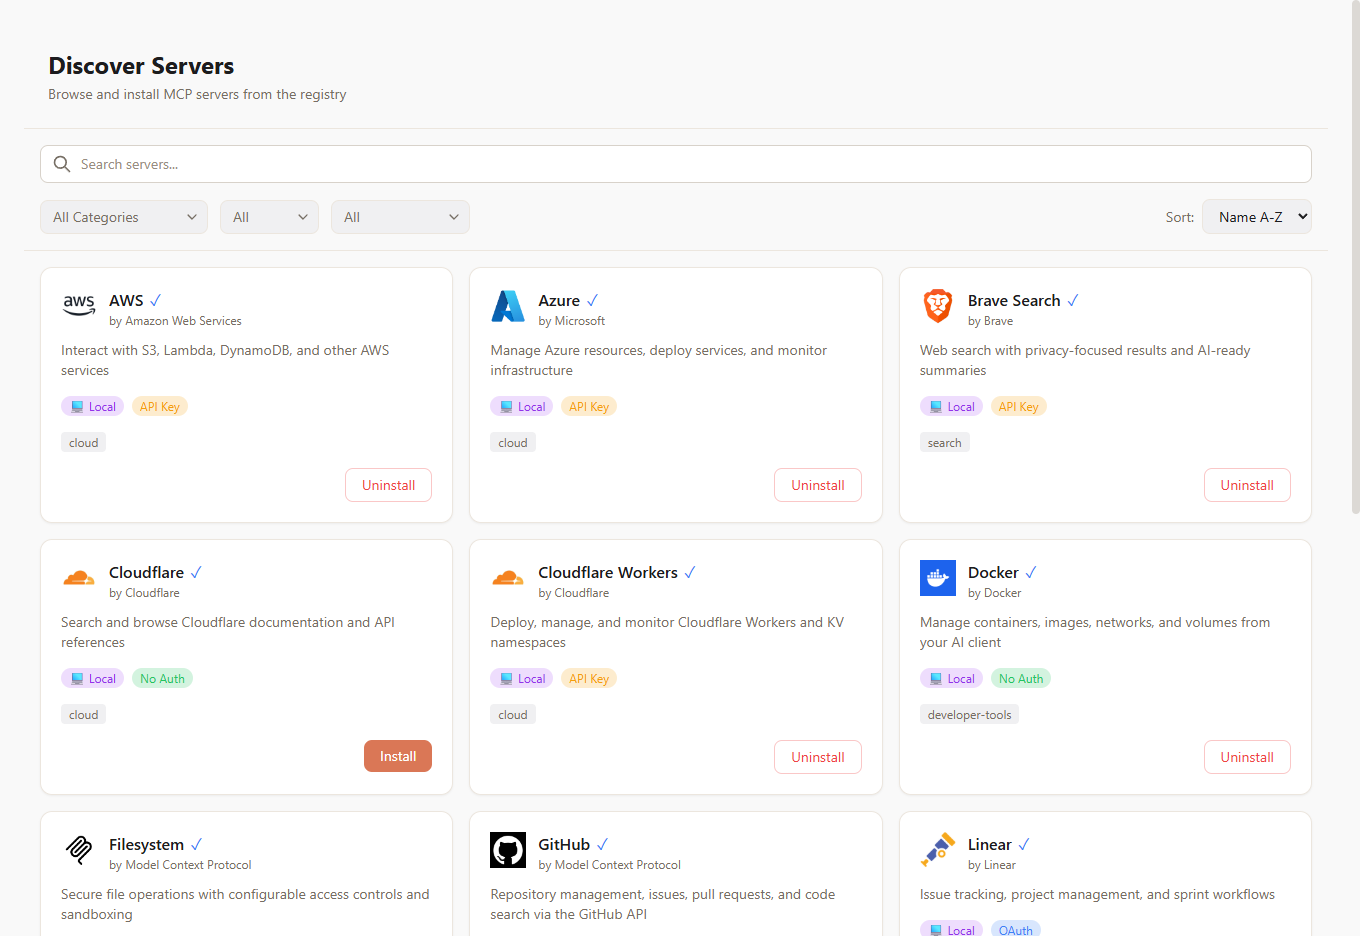
If a server needs authentication, a configuration dialog opens after installation. Fill in the fields and Save — the Save/Cancel buttons stay pinned at the bottom no matter how long the form is.
- Secrets are encrypted with AES-256-GCM and stored in your OS keychain — never in plain-text files.
- Use the obtain link (when provided) to jump straight to the service's token page.
See Server Management for all options.
On the Home dashboard, start the gateway. It listens on localhost:45818 and connects your enabled servers (🟡 connecting → 🟢 connected → 🔴 error).
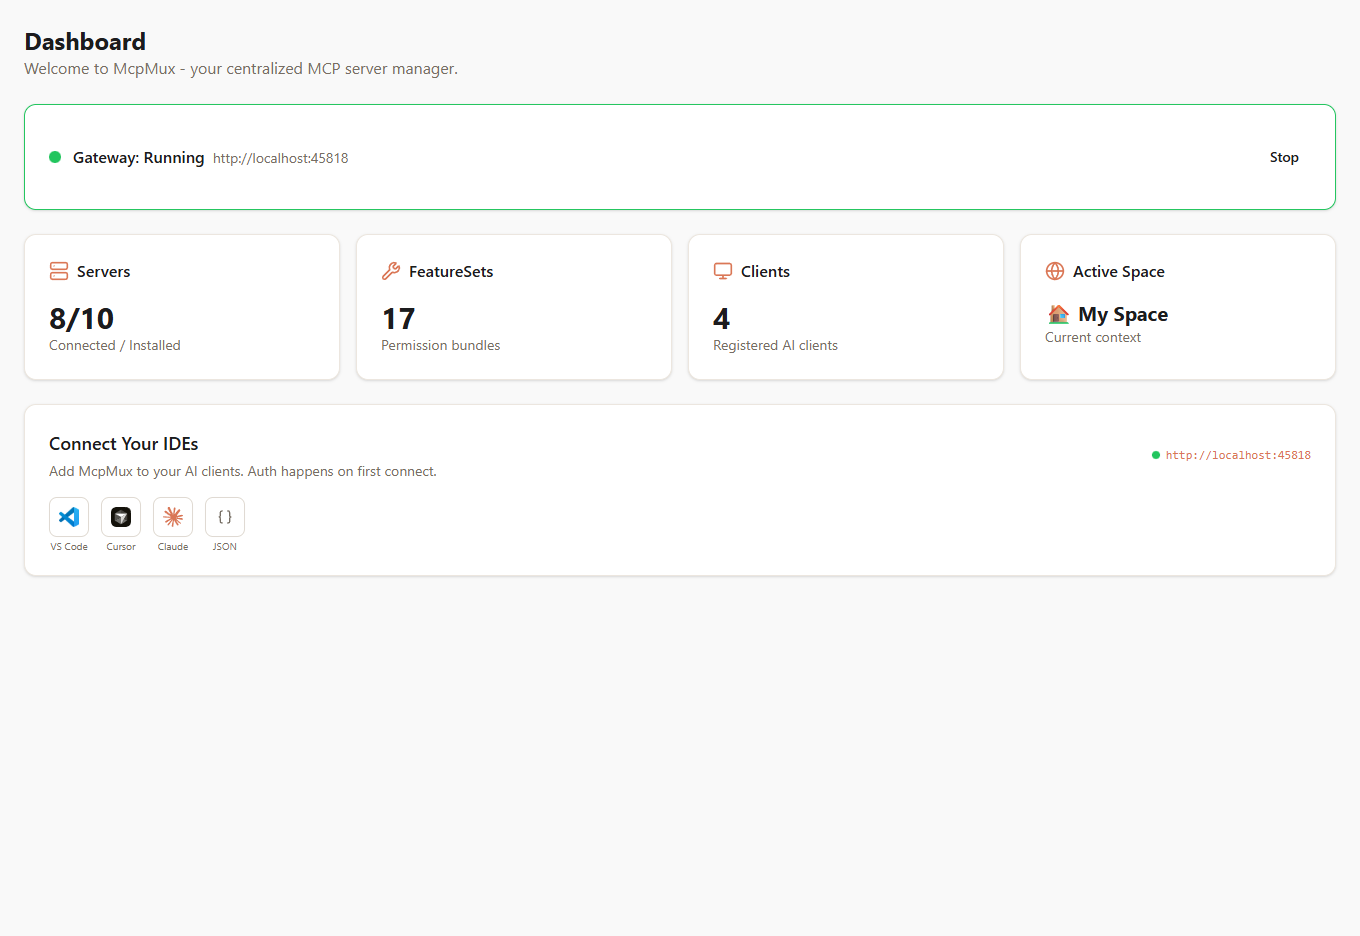
VS Code and Cursor are one-click from the Home dashboard's Connect a client row. For everything else, point the client at the gateway endpoint:
{
  "mcpServers": {
    "mcpmux": {
      "url": "http://localhost:45818/mcp"
    }
  }
}- Cursor →
.cursor/mcp.json· Claude Desktop →claude_desktop_config.json· Windsurf → use"serverUrl"instead of"url" - VS Code (Copilot) →
.vscode/mcp.jsonunder a"servers"key
The first time a client connects, McpMux pops a one-click approval — "Allow VS Code to connect?". Approve it and the app is registered: it authenticates over OAuth 2.1 + PKCE and gets an access key stored in your OS keychain.
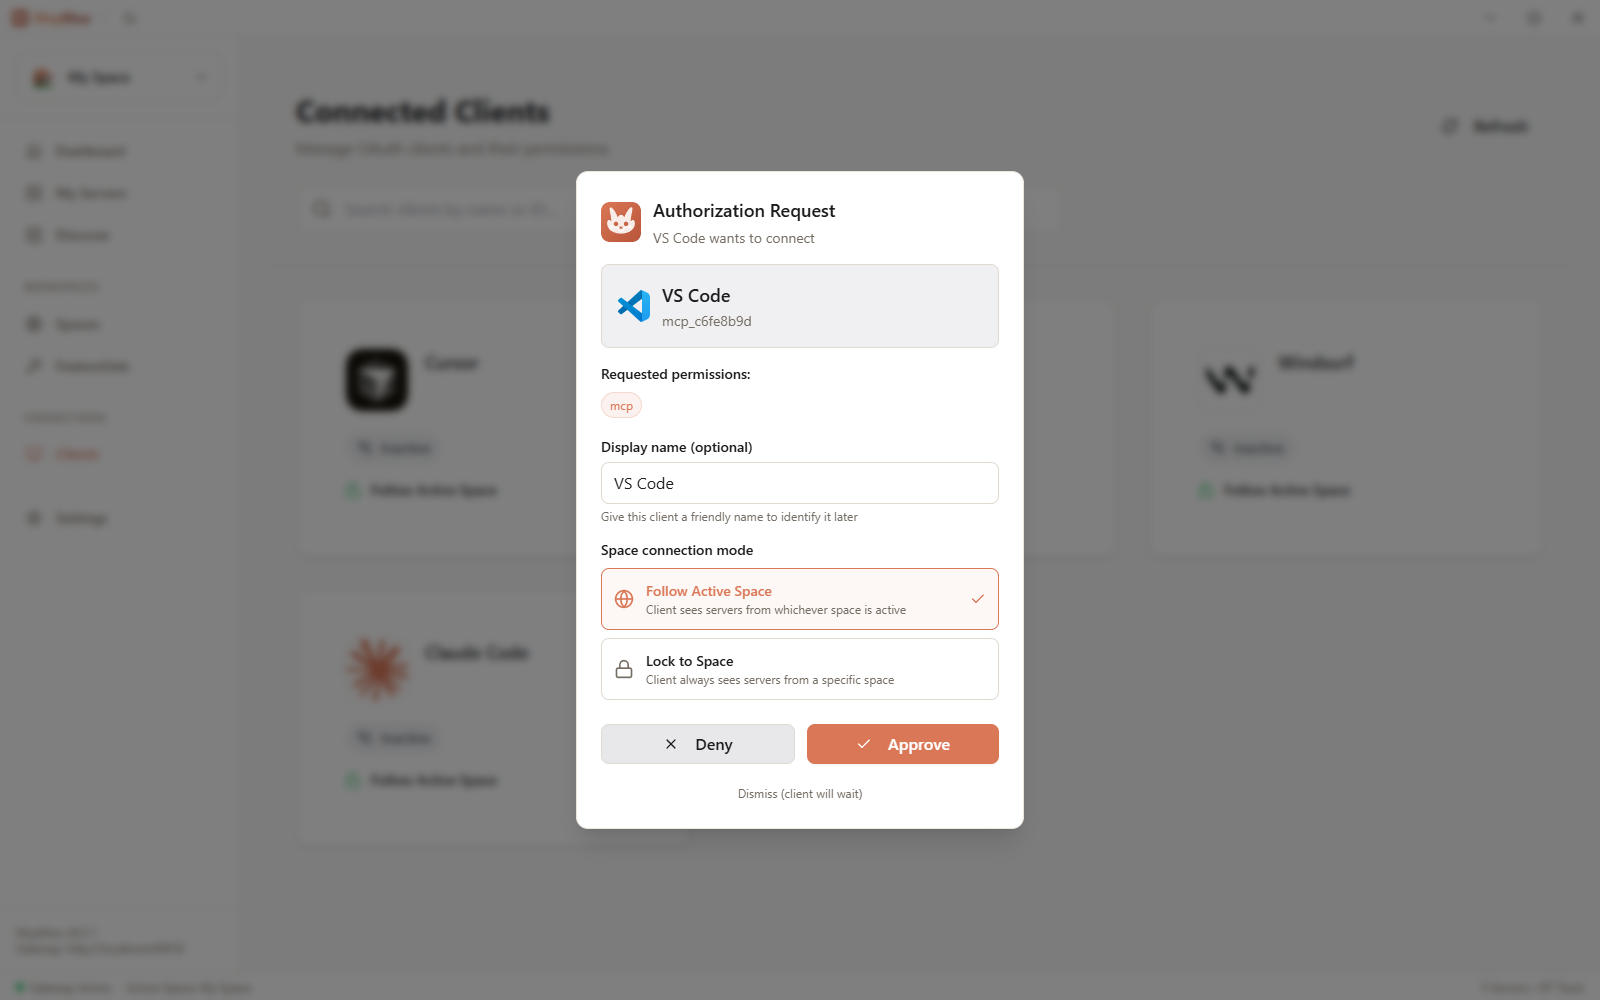
You can rename, inspect, or revoke any connected app later from the Apps page. See Clients.
This is the key idea: McpMux decides which tools a session gets from the folder the client has open (its workspace root) — not from the app itself. Two IDEs in the same folder see the same tools.
- By default, a session uses the active Space's FeatureSet.
- Map a folder to a specific Space + FeatureSet in the Workspaces tab: open your backend repo and the AI sees your database and deploy tools; open a docs folder and it sees only search and filesystem. Matching is per-folder and exact, so nothing leaks across projects.
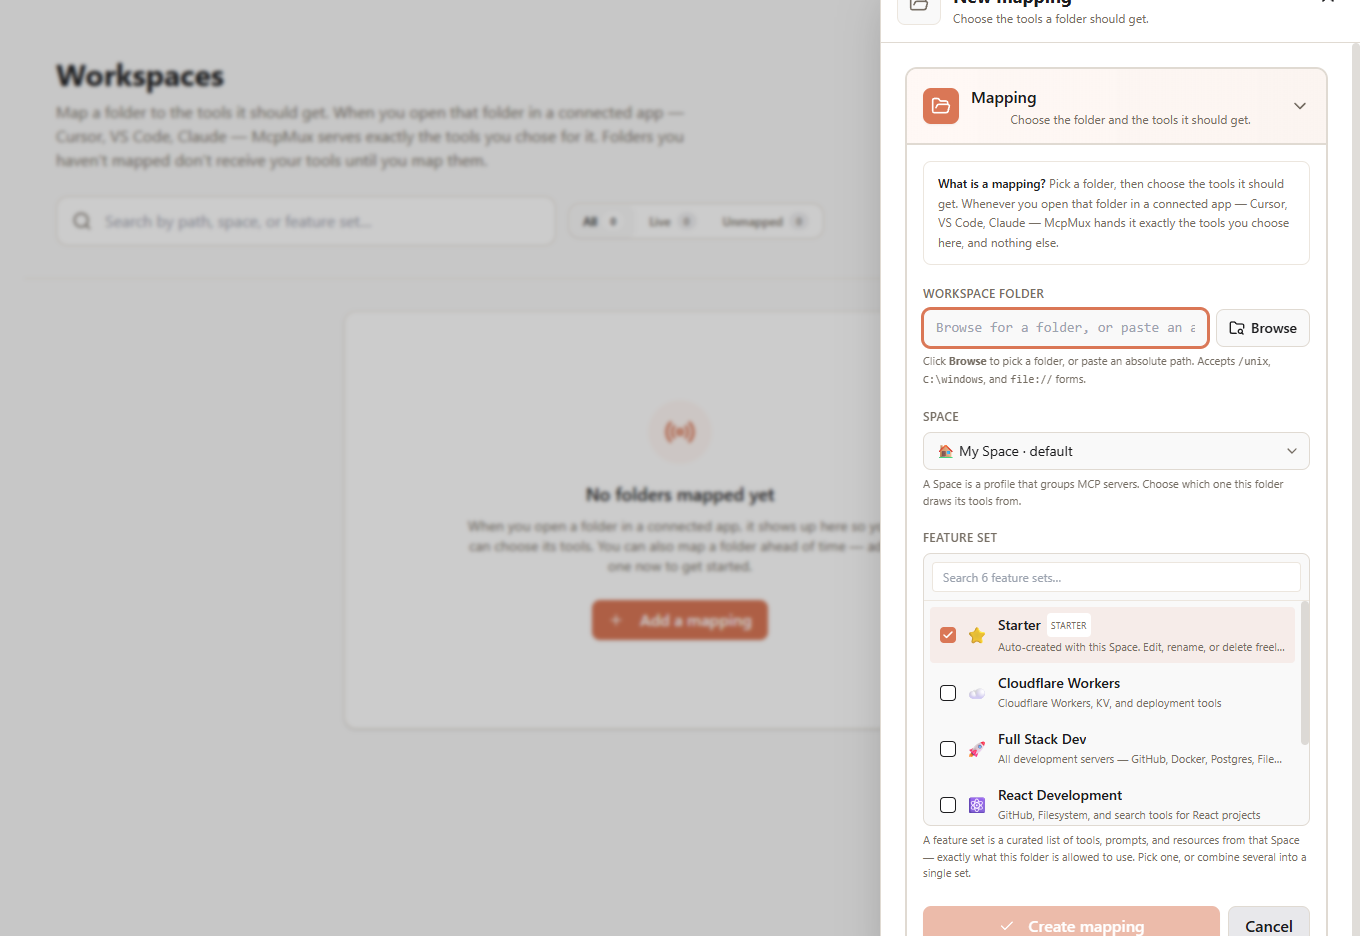
See Workspaces for routing and FeatureSets for building the tool bundles a folder resolves to.
Don't want to map folders by hand? In your AI client, start a request with @mux:
"@mux optimize this folder."
The assistant discovers what's available, composes a focused FeatureSet of just the tools it needs, and pins it to the folder — so every future session there resolves to exactly those tools. Read operations run silently; anything that changes your setup pops a one-click approval that names the exact Space.
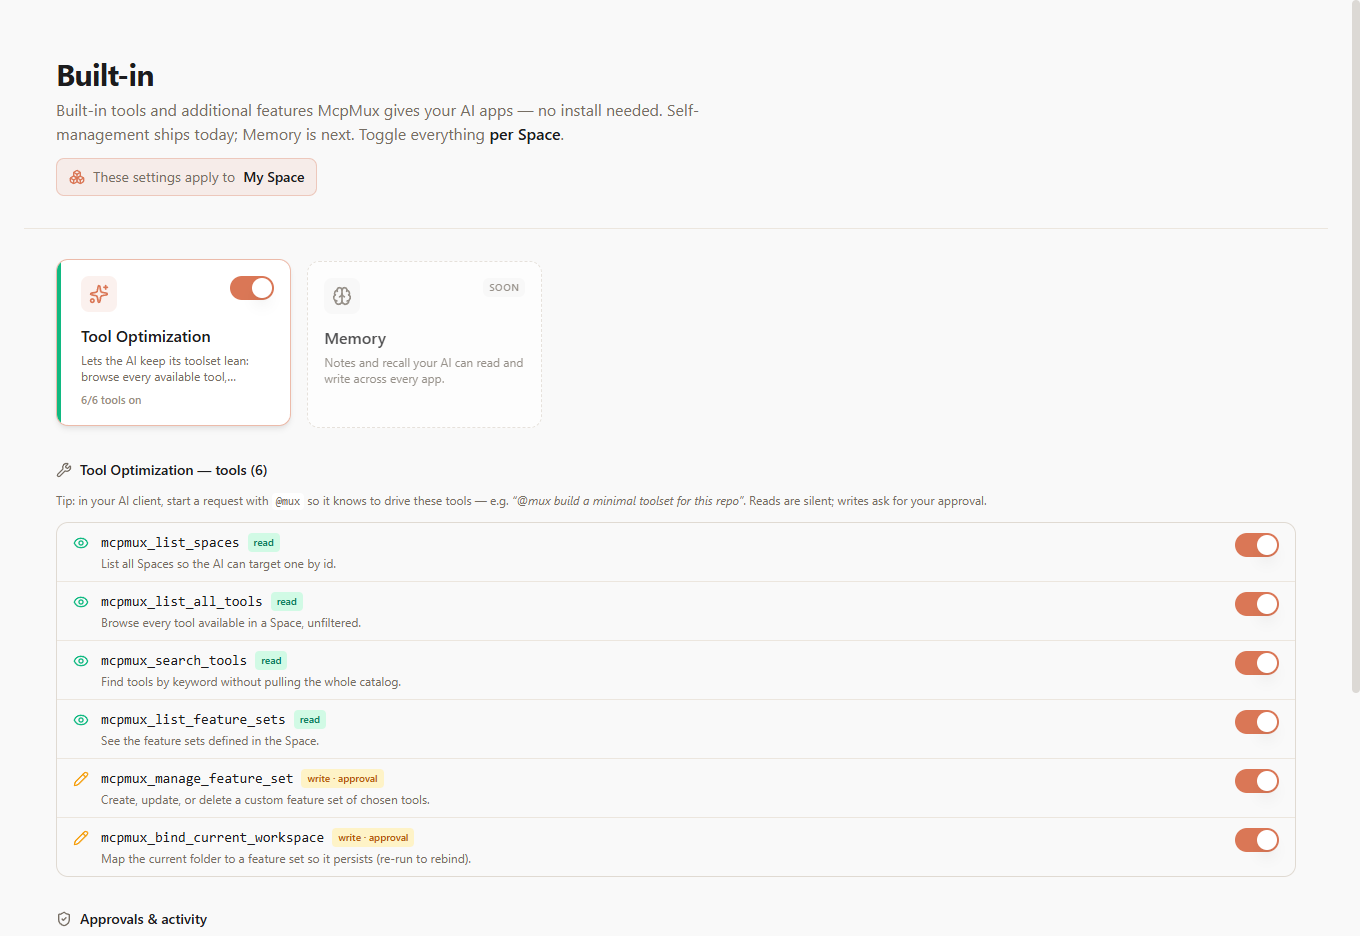
See Tool Optimization.
One gateway for every client, credentials encrypted in your keychain, the folder decides the tools, and the AI can tune its own toolset with @mux.
- Spaces — isolate work, personal, and client contexts
- Workspaces — route each folder to its own toolset
- FeatureSets — curate exactly which tools, prompts, and resources are exposed
- Tool Optimization — let the AI keep its toolset lean
- Clients — manage and revoke connected apps
- Security — how McpMux protects your credentials